Active Directory is a widely used Microsoft product that operates on windows server, it’s a database and set of services developed to help your organization with access, management and permissions for your network. The organizational data within AD can be in the form of devices, files, users, applications, groups and shared folders. In my 5 years within a support role, I’ve always used Active Directory and it has been essential to my work. So within this Guide Im going to walk you through setting it up within Windows Server 2019.
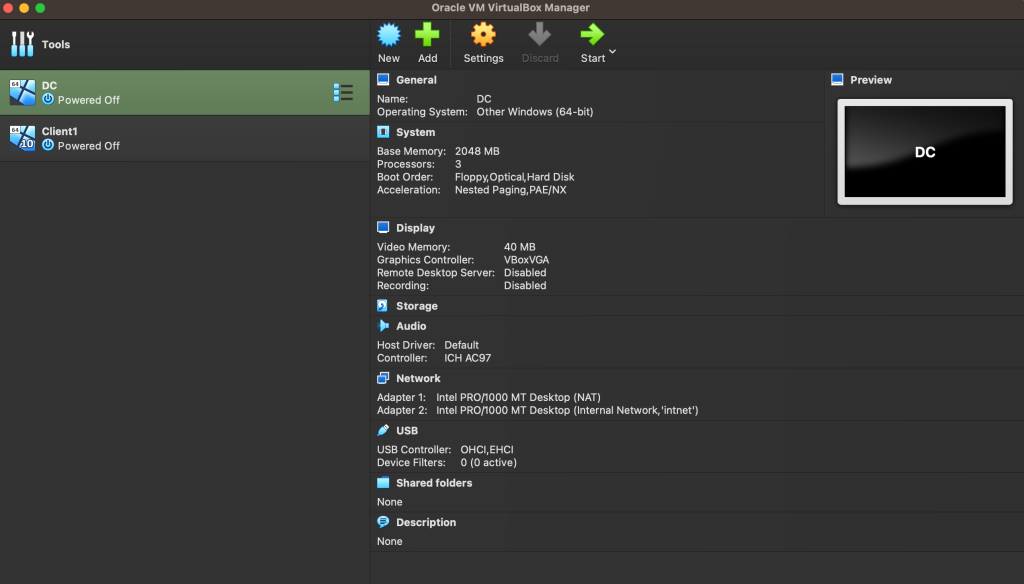
The first step was to create a windows server virtual machine on virtual box.
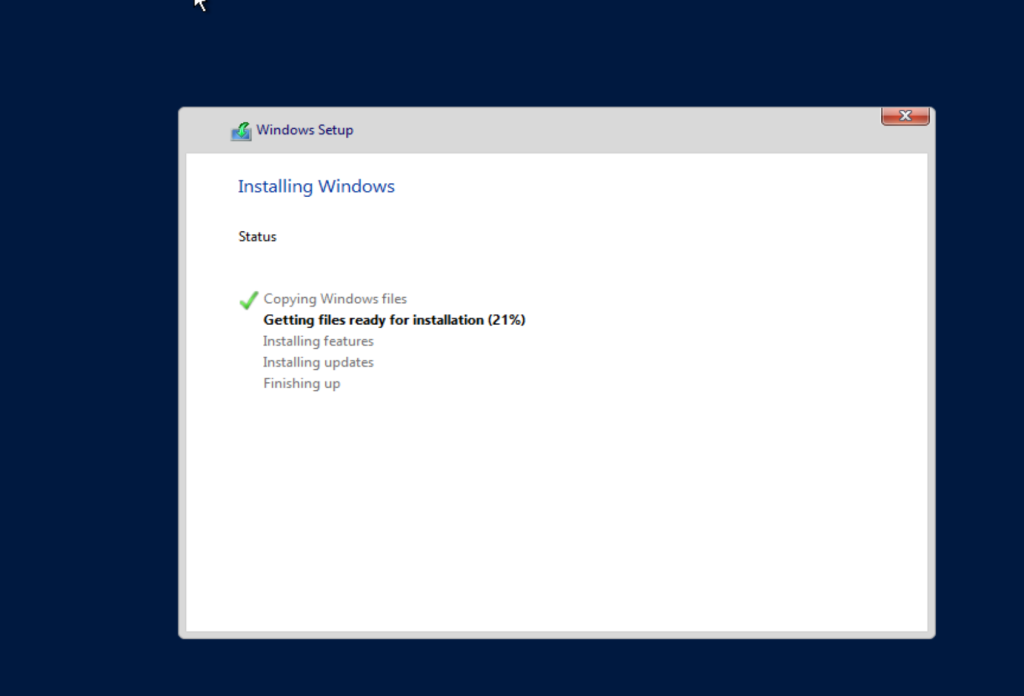
Once added I loaded the iso file for Windows Server 2019 and went through installation.
Once installation was complete, it was time to setup Networks. I navigated to network connections to determine which network adapter would be used for External and Internal.

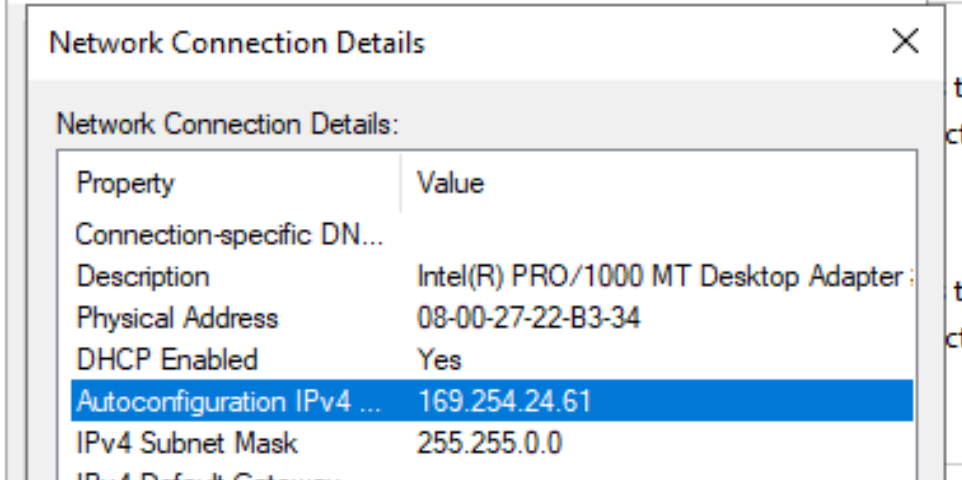
Once in the network details It was easy to locate the network that would be used for internal as it had the IP of 169.254.xxx.xxx and we know that an address with 169.254 the DHCP is not reachable and the 169. address was automatically assigned to it.
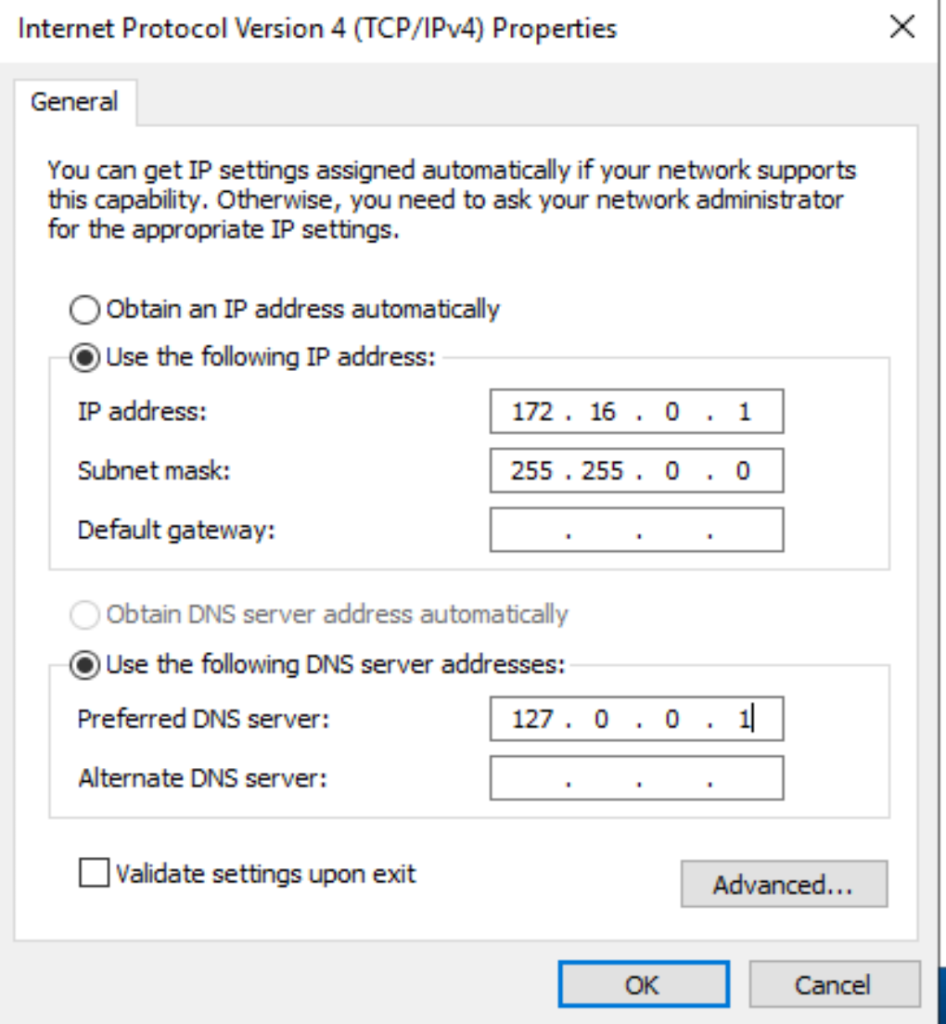
Once I properly identified the networks and renamed them to reflect Internal and Internet. I changed the properties for IPV4 internal network to use a static IP address. The domain controller is going to serve as the default gateway so that the IP address is not set. Once we install Active Directory it automatically installs DNS so this server can use itself as DNS. So what I did was enter the loopback address.
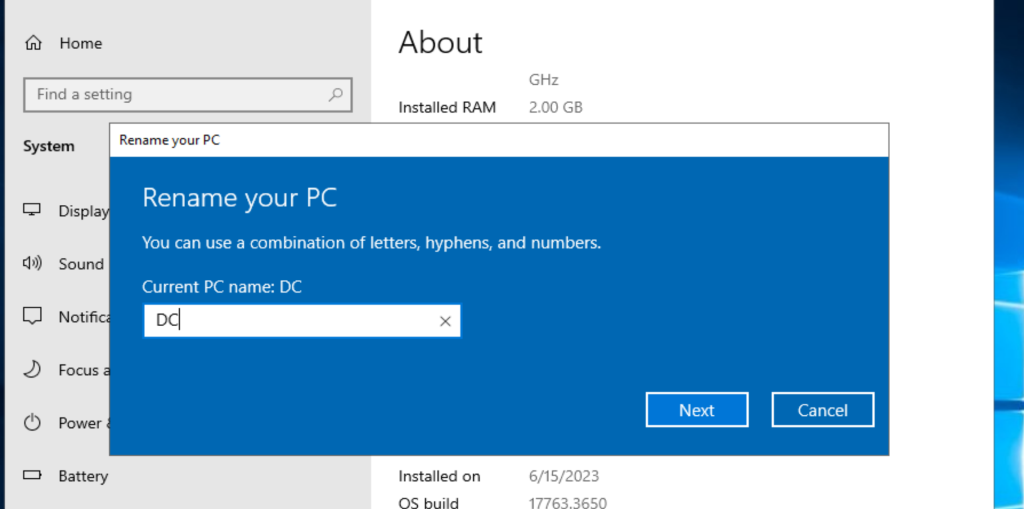
With network adapter properties set I renamed the server to DC (domain controller) and the restarted it.
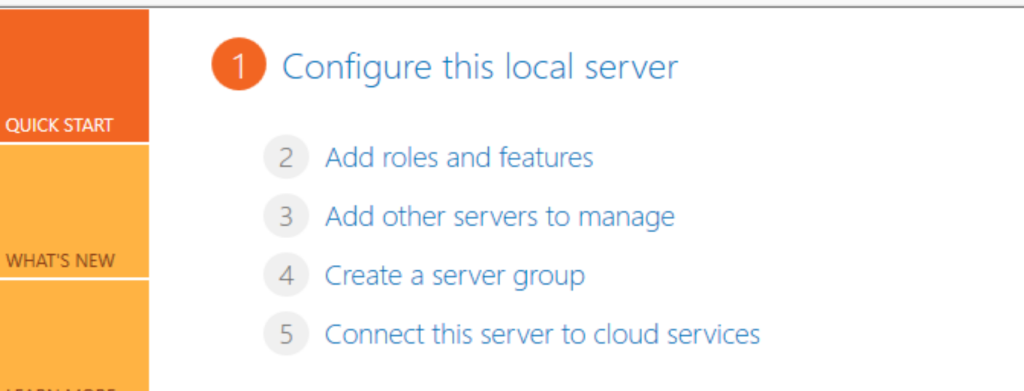
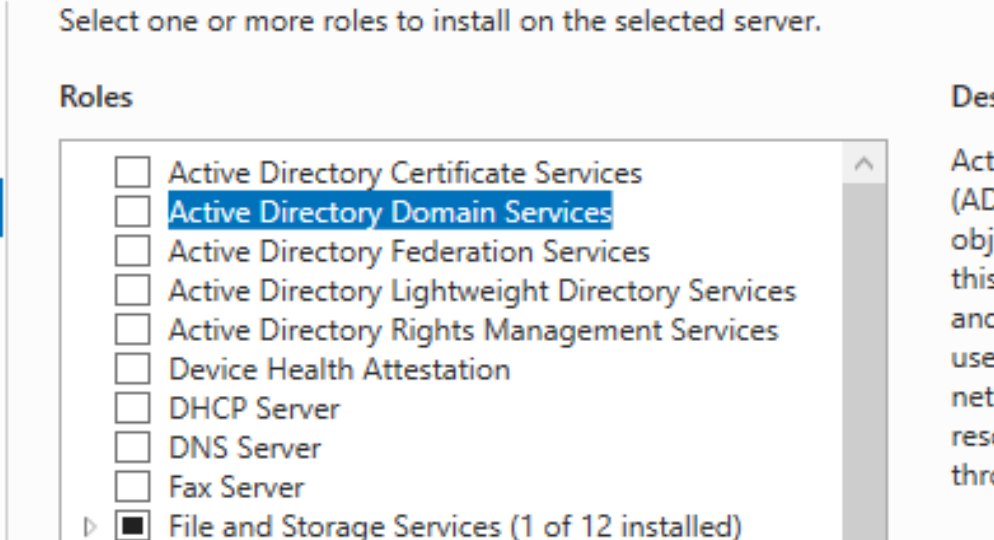
Once back in, it’s time to install the Active Directory domain services. I opened server manager and went to ‘Add roles and features’.
Select the correct server and then I chose ‘Active Directory Domain Services’ in the server roles section and continued through to installation.
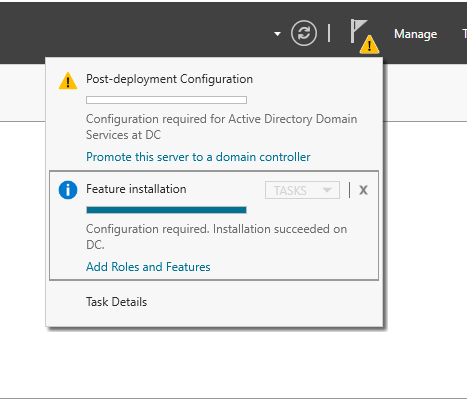
Once installed and back in the Server Manager dashboard I did the post deployment configuration, this can be found in the notifications section (flag icon), this is where the domain is actually created.
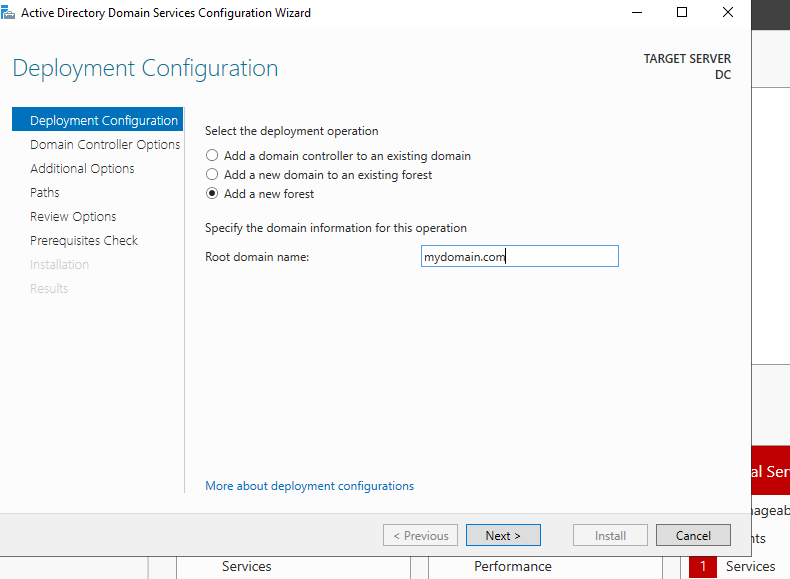
In deployment configuration screen, I chose ‘add a new forest’ and then gave it a new root domain name. I went through the remaining options with default settings and selected install and let it finish and reboot the server.
After the restart, I created a dedicated domain admin account. I did this by going to ‘Active Directory Users and Computers’ from the start menu. Once open, under the newly created domain I opened a new organizational unit.
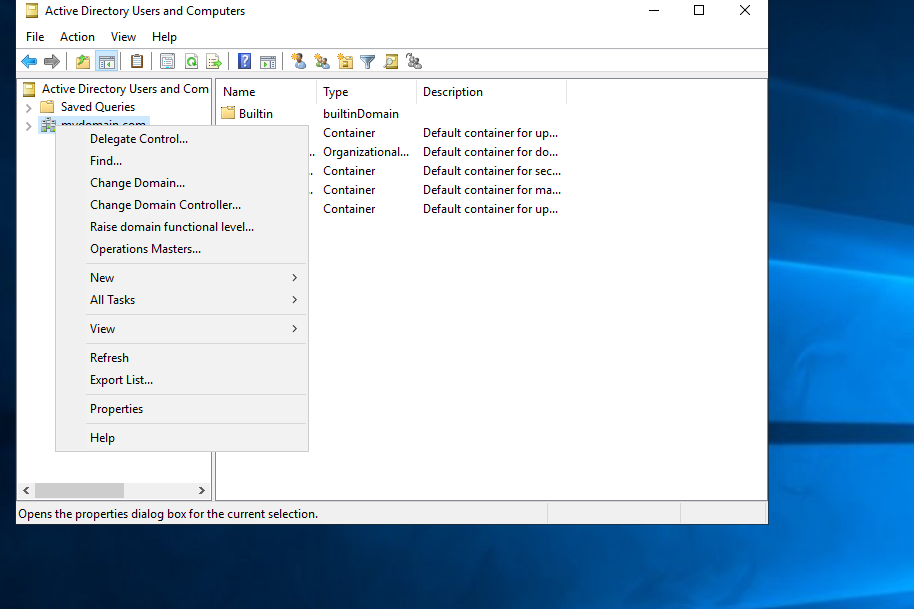
In organizational Unit, create a new user.
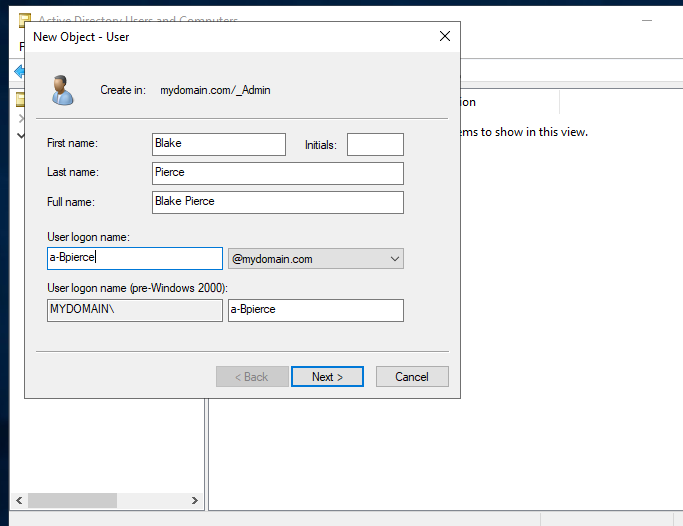
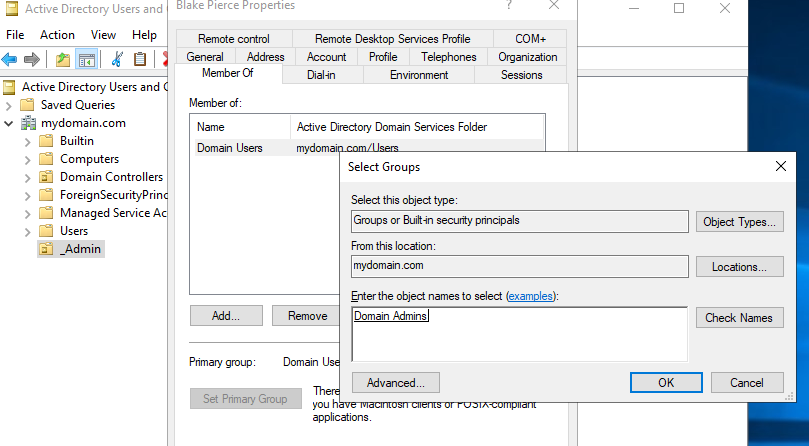
After created my user, I went to properties and under ‘Member of’ tab I added ‘Domain Admins’ which gave me my own domain admin account.
Next I signed out and back in with my admin account.
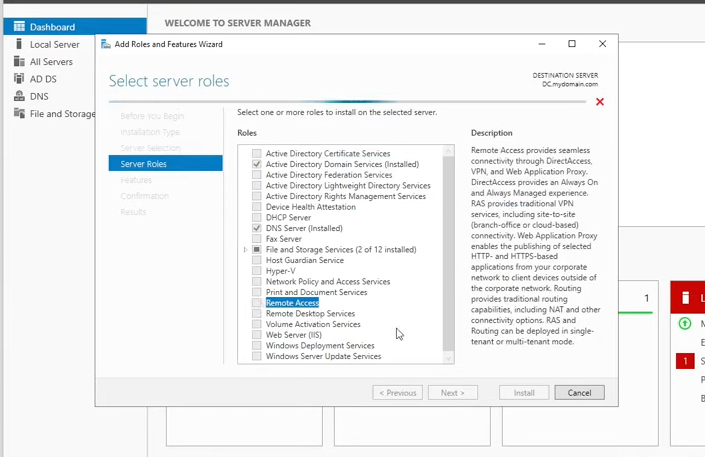
After logging back in the next step was to install a remote access server to allow clients on the internal network still be able to access the internet. In Server manager go back to “add roles and features. In the ‘Server Roles’ section I selected ‘Remote access’ and installed the ‘Routing’ option.
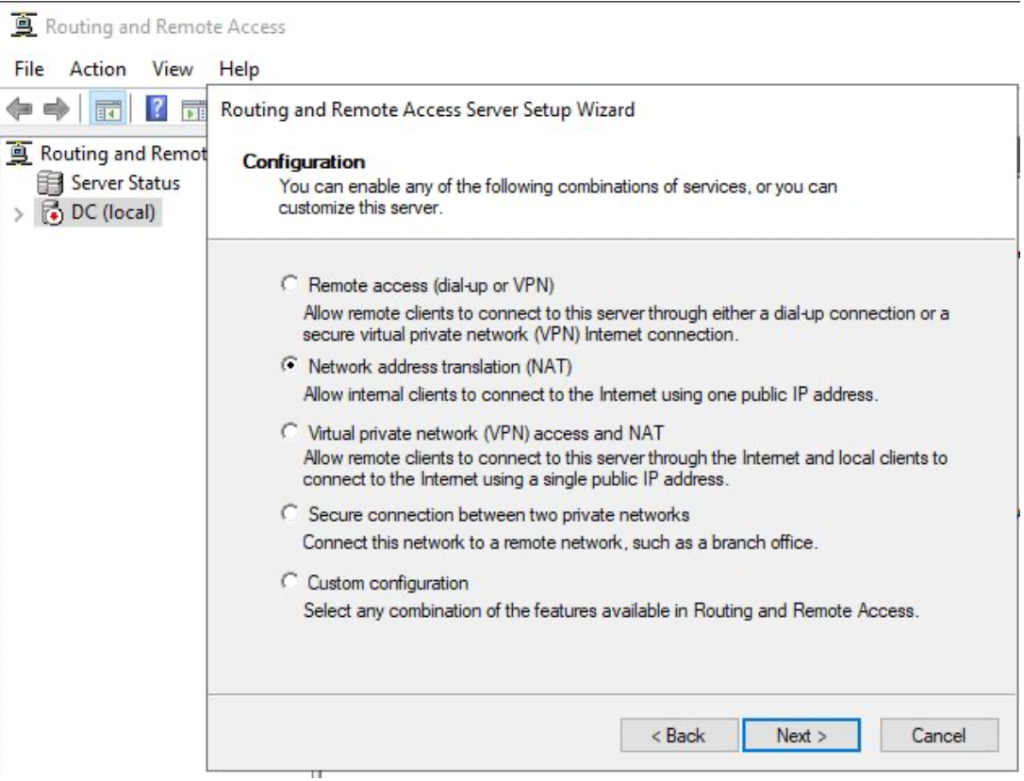
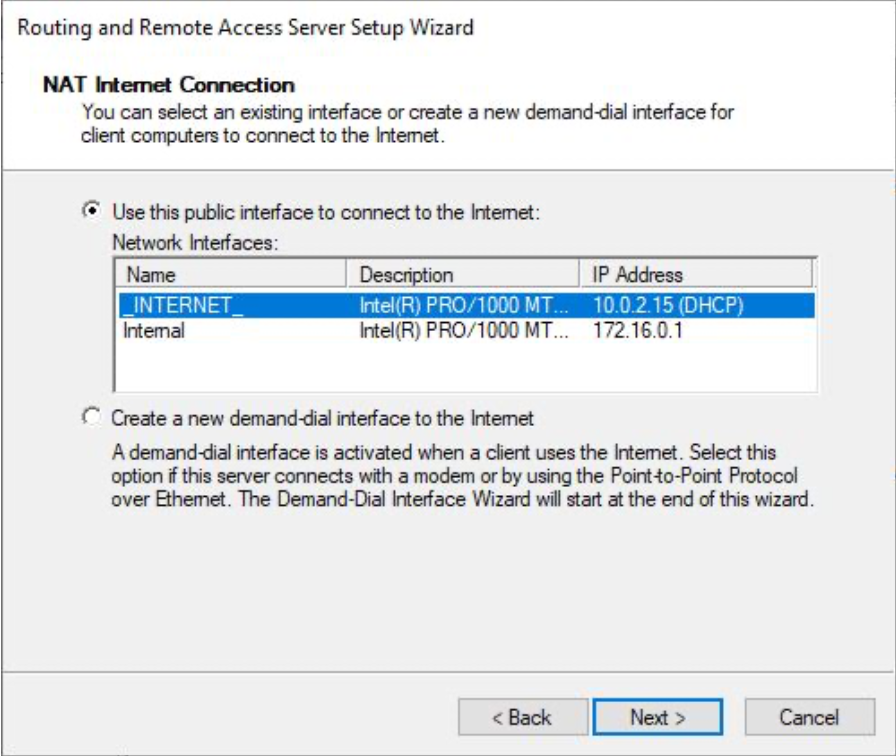
Once thats completed I went back into ‘Server manager’ under tools I chose ‘Routing and Remote access’. From here I went to ‘Configure and enable routing and remote access’ for the domain controller and installed ‘Network address translation’ (NAT) which will allow all clients on the network to reach out the outside internet sharing one public IP address.
Choose the correct network adapter and finish the installation.
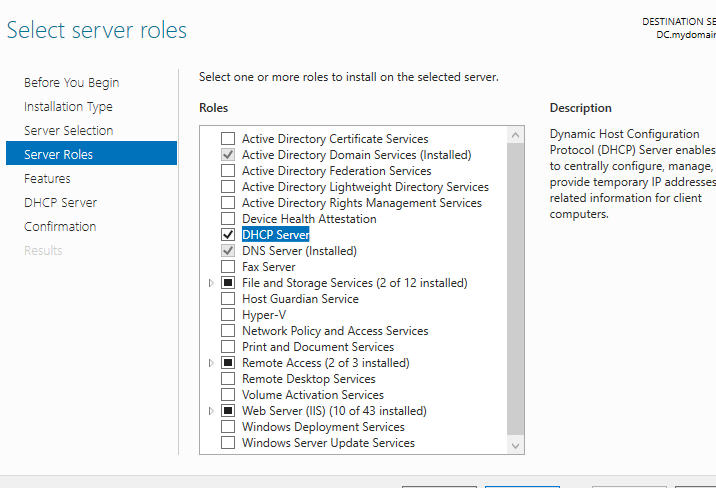
Once installed and back in the server manager dashboard, I went back to ‘Roles and features’ and chose ‘DHCP Server’ under ‘Server Roles’ and installed it.
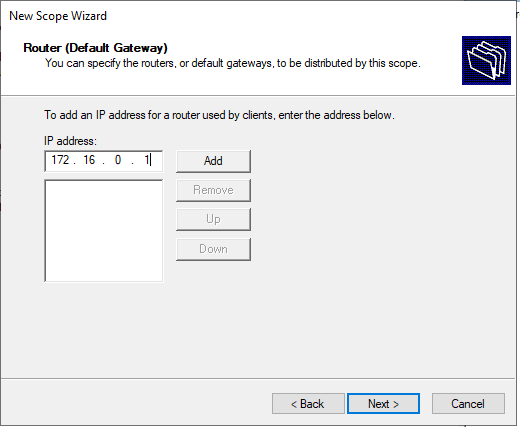
Under the Domain I went to the IPV4 section and created a ‘New Scope’ and set up the range of IP ‘s to be used and the subnet mask. I didn’t need to exclude any IP’s and left the lease duration as default, since this is my own custom network.

After this was the next step is to configure the DHCP options which allowed me to setup the Router(Default Gateway). This is what enables clients to access the internet.
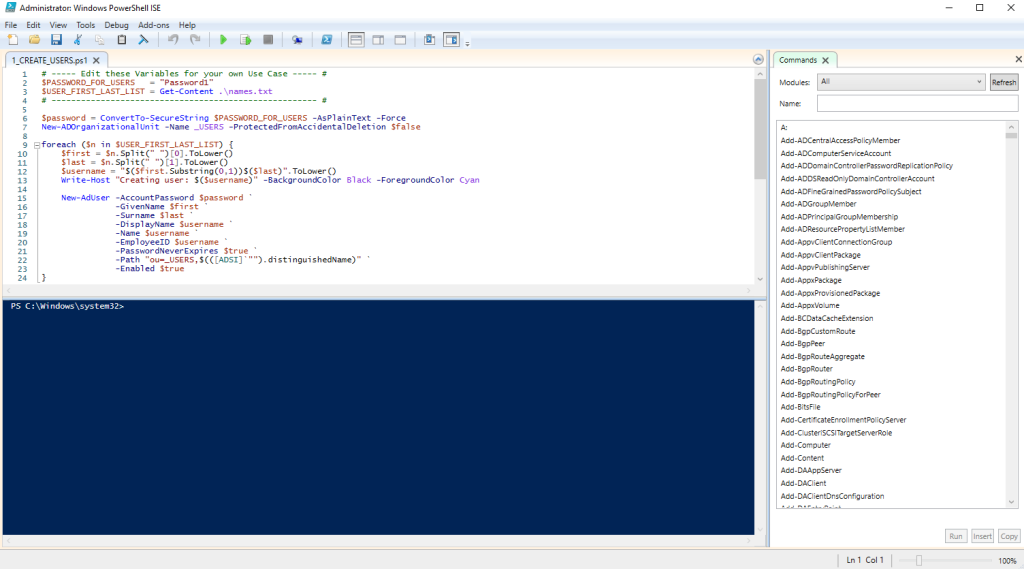
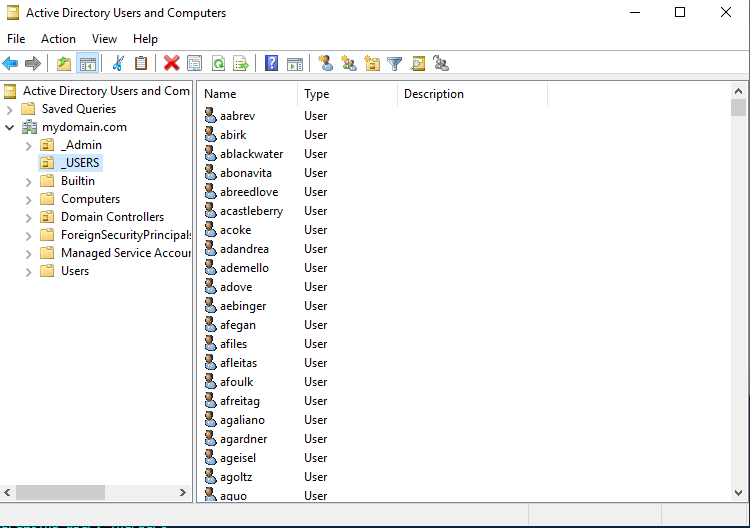
So for this to look like a network with multiple users. We need many accounts, for this I found a powershell script that automates this process. Within Powershell ISE loaded the script that created hundreds of random user accounts.
This script creates new organizational units for users and adds the hundreds of names from the text file. it creates them all with the same password for convenience and uses a loop to extract each name from the text file to setup new accounts for each one.
After running the script, I verified within ‘Active Directory Users and Computers’ that the ‘_users’ organizational unit was created and now has all the accounts within it.
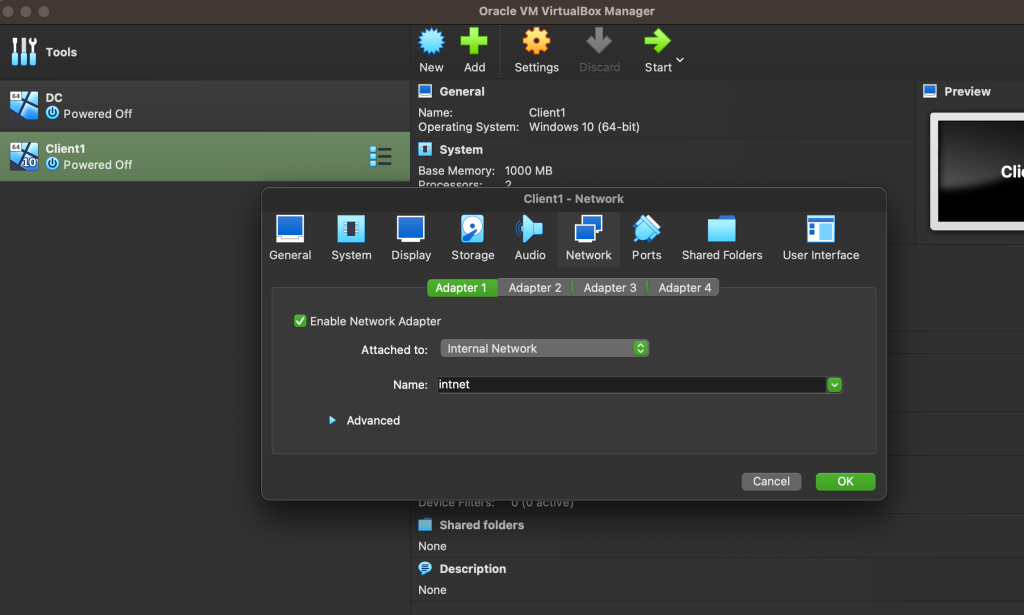
Now with all the user accounts created, you want to have a new VM so that the client could connect to the network using one of the new accounts.
I created a Virtualbox VM and installed a fresh copy of Windows 10 on it. In settings for the VirtualBox I changed the network adapter to ‘Internal Network’ and then completed the installation of Windows 10.
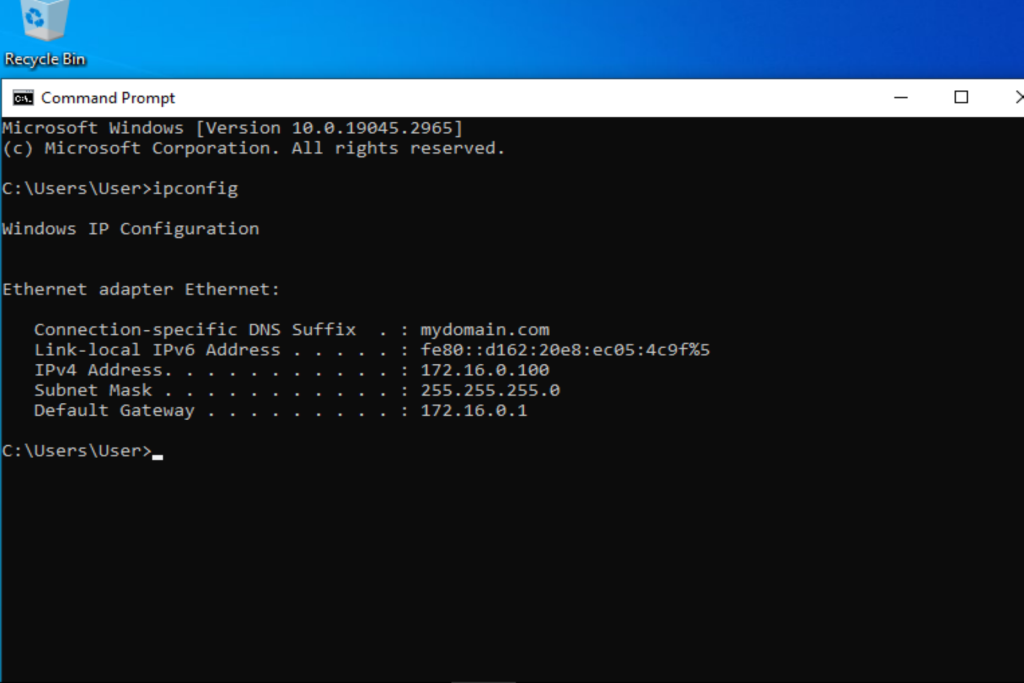
Now once installation was complete and I’m in the new Vm, I wanted to check that the internet was working. This was done by opening command prompt and using the “ipconfig’ command and could see that it does have a IP address assigned within the range set and has the correct default gateway.
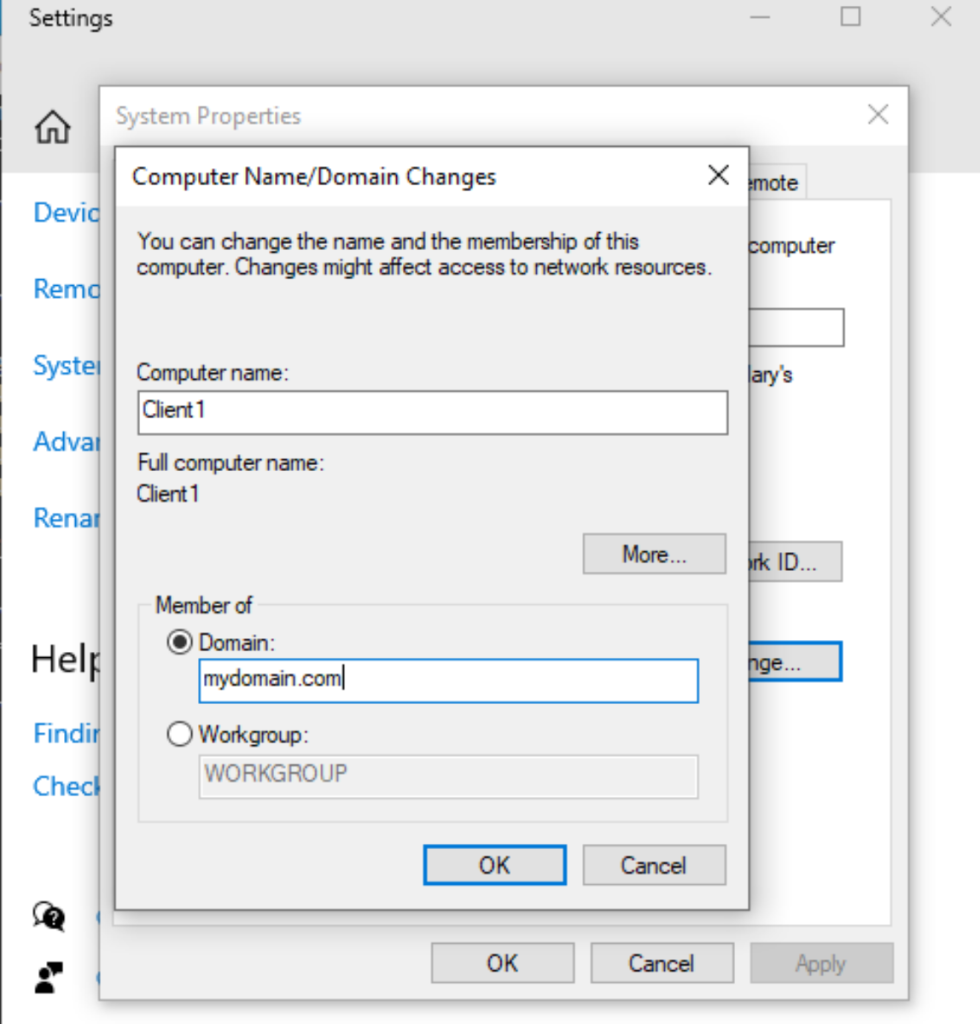
Next within the client computer I changed its name and changed the domain to that of the domain controller and restarted the comp.
Now I logged into the server, opened DHCP and verified there was a new lease for the new client comp.

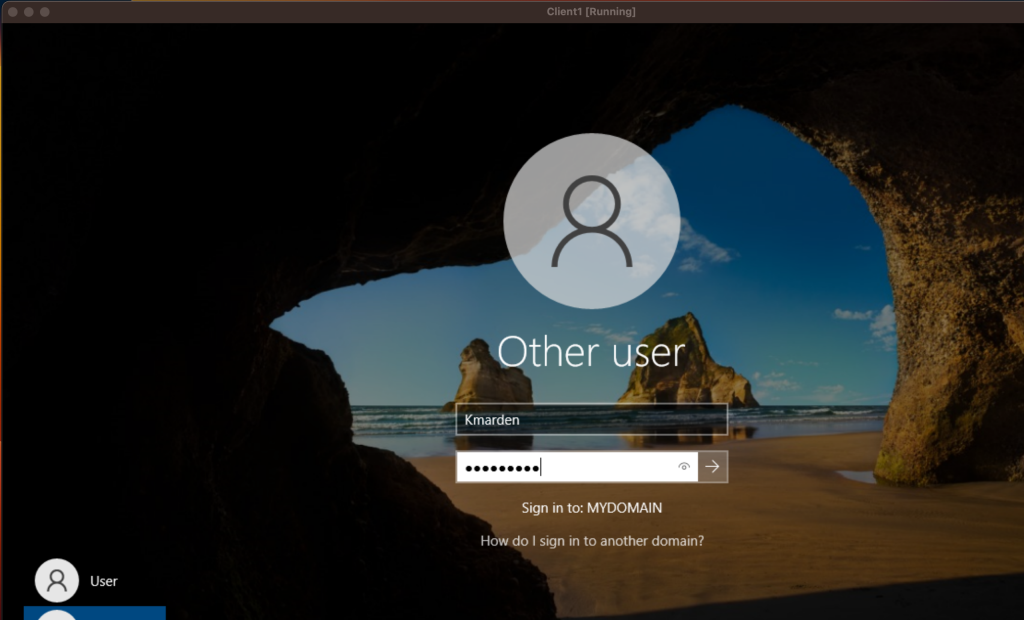
The final step is to log into the network with the client computer using one of the newly created user accounts. Doing this will any of the created users login to the network with any client computer.